Overview
This programming assignment is an enhancement to the previous 1024 Game by adding a "Game Configuration" screen to allow the user to:
- Select a different board size
- Select the target value to win the game
when the user taps on the "Settings" button.
Requirements
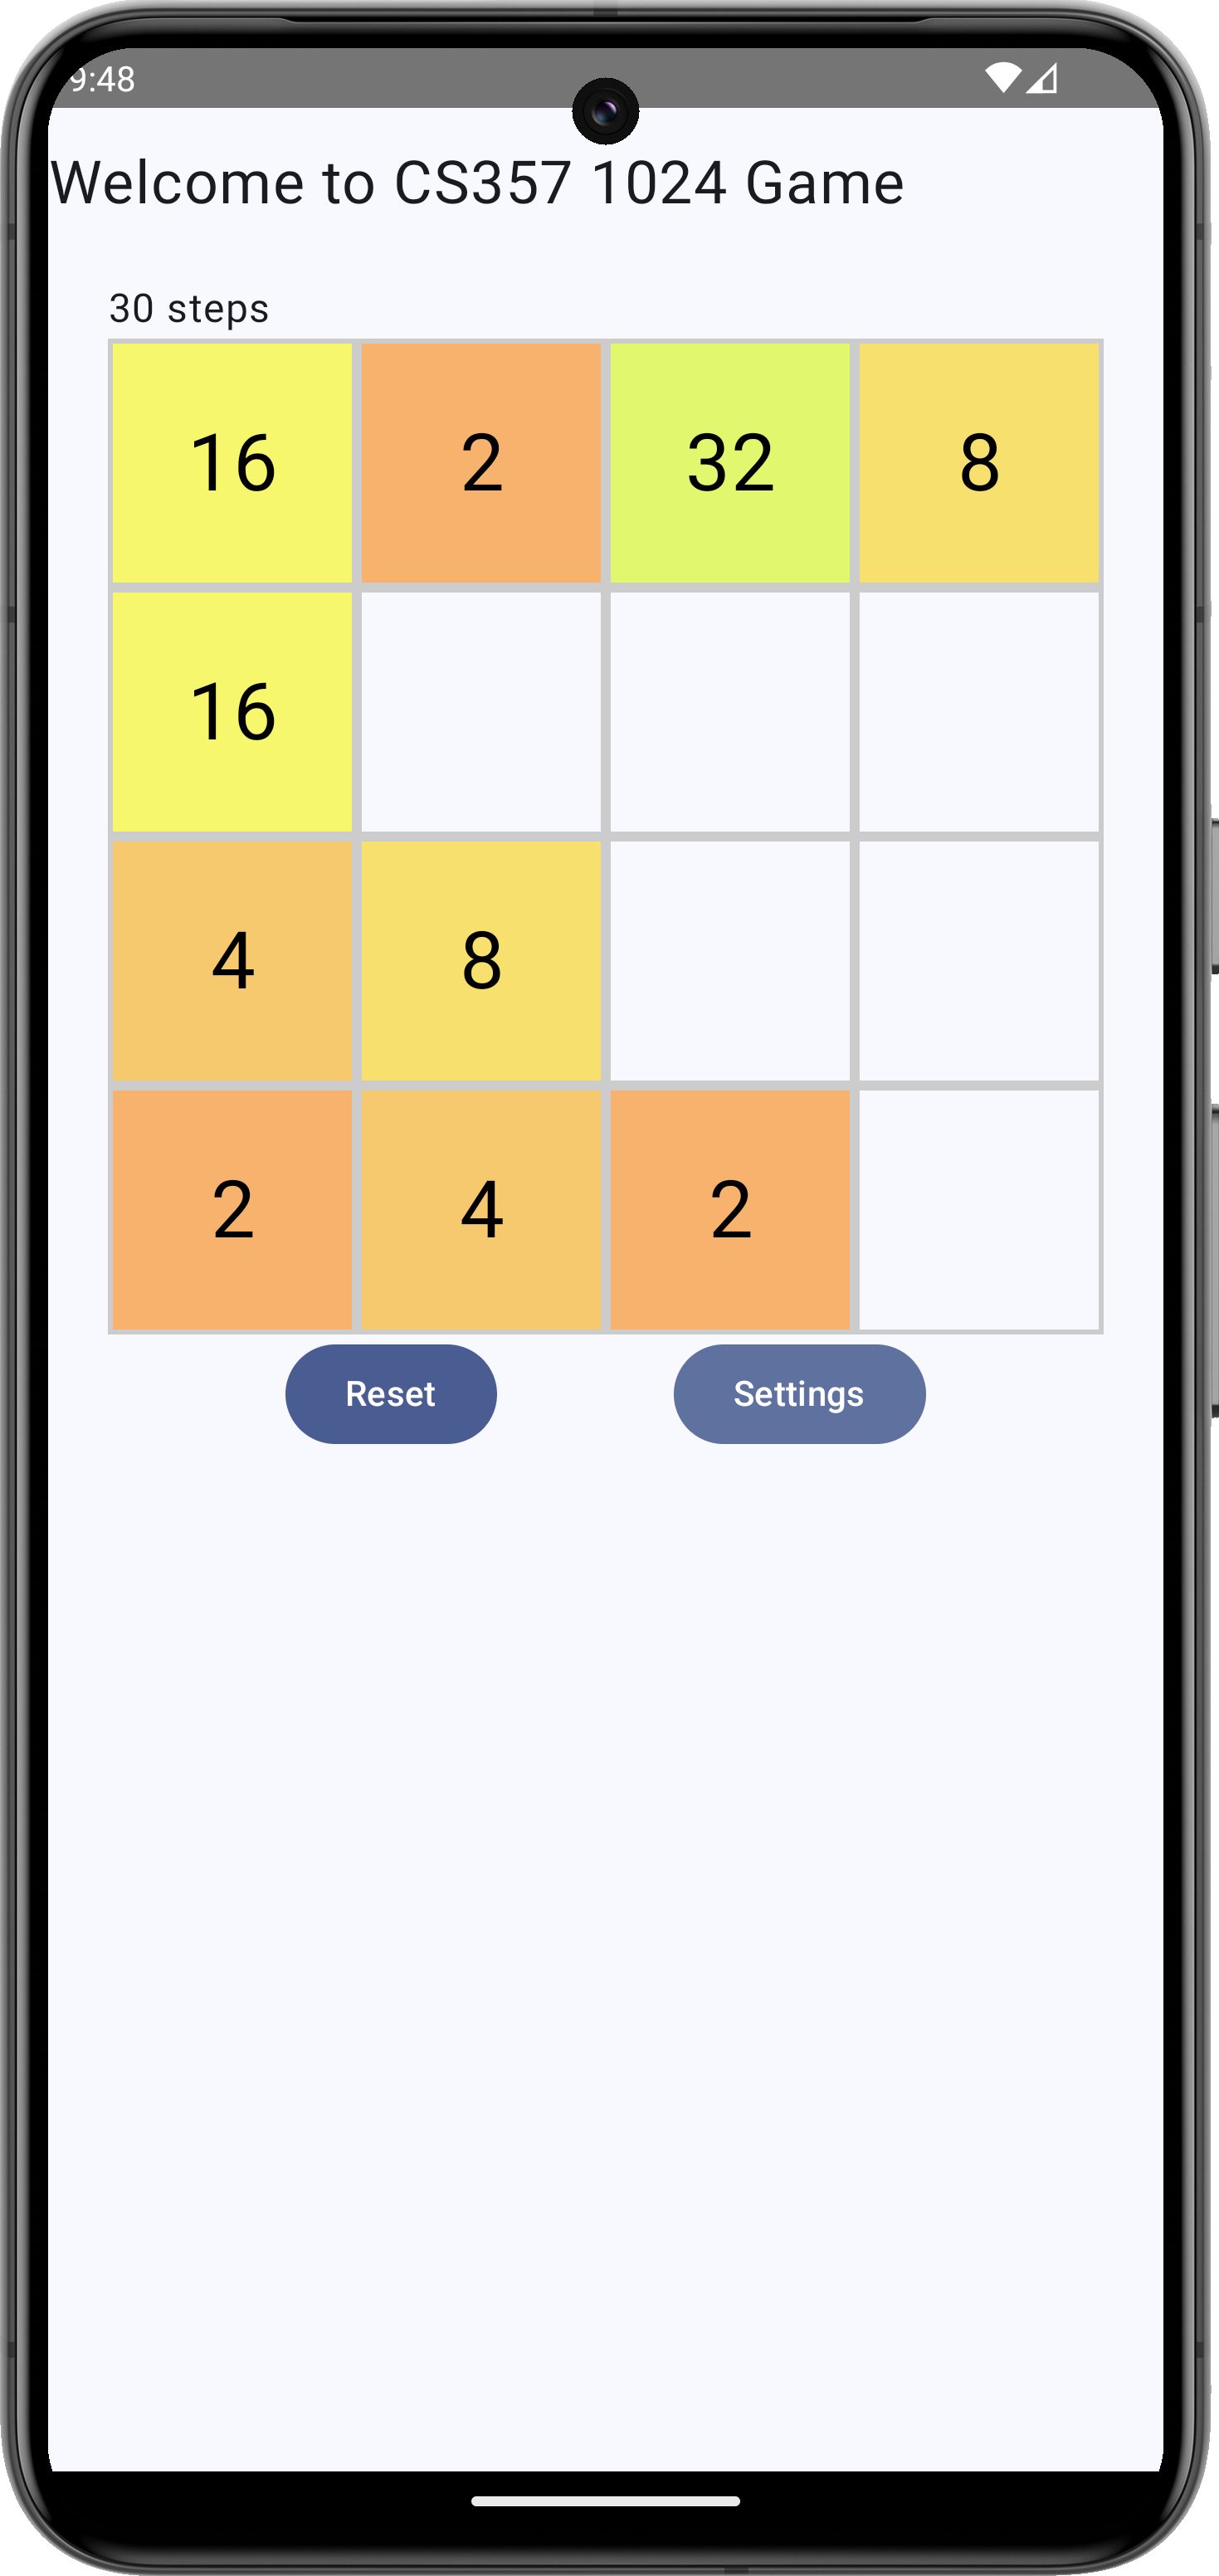
The Main Screen
- Add a new button ("Settings" or "Configuration") to the main screen of your app
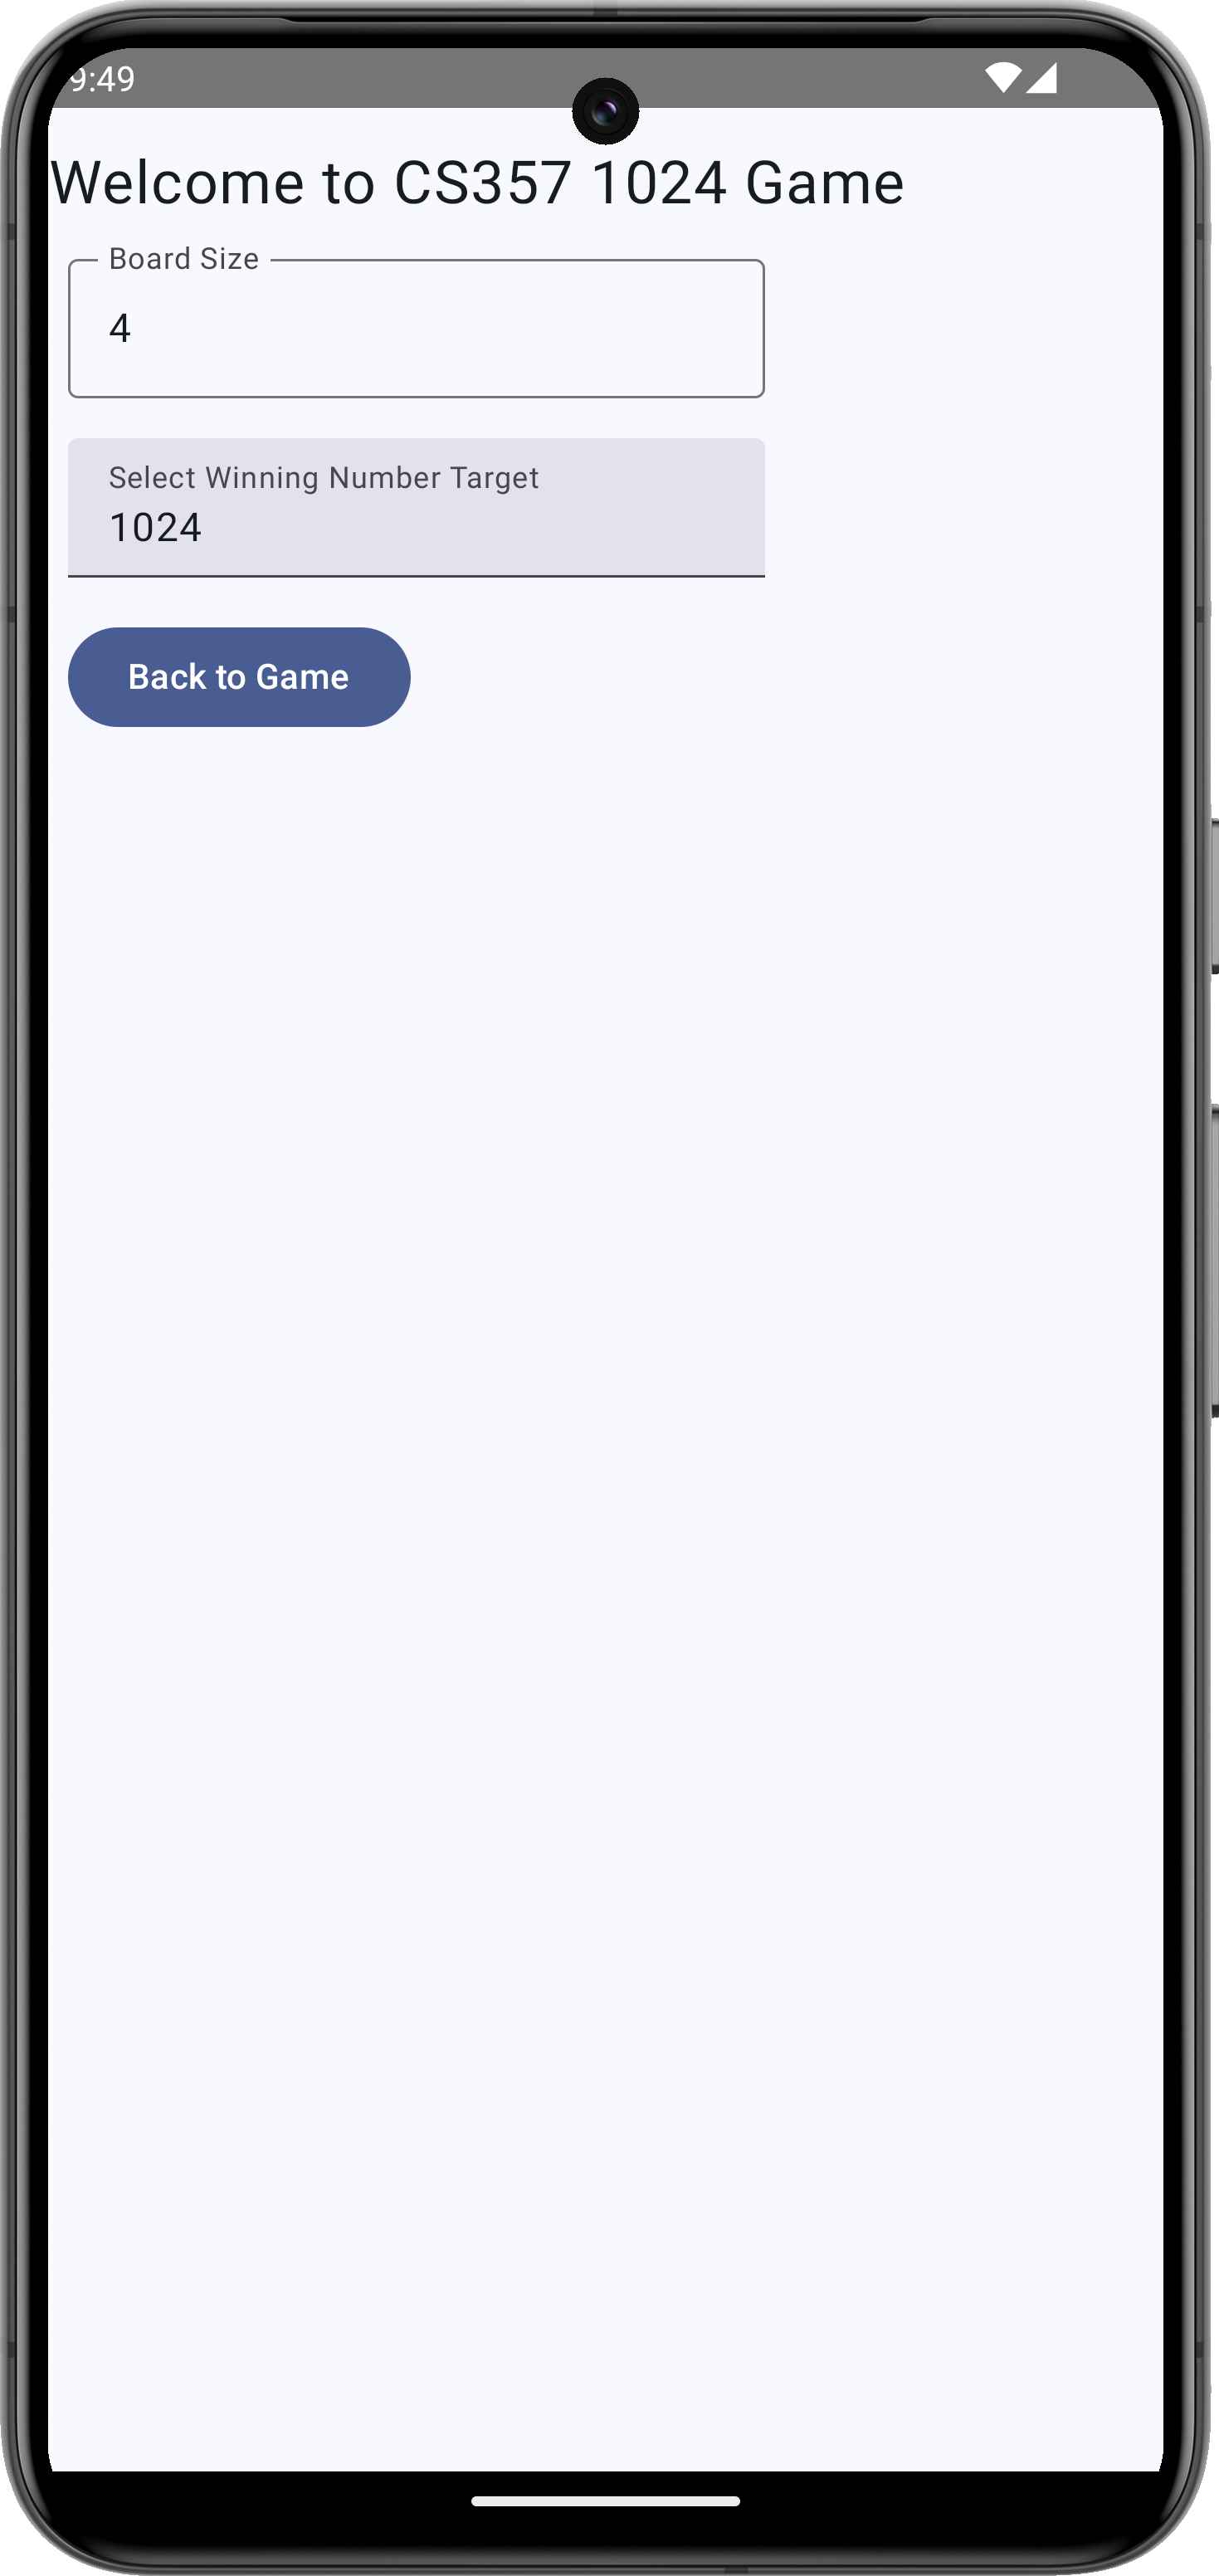
The Game Configuration Screen
The game configuration screen should contain (at least)
Two input fields
- One for the grid size (an integer between 3-7). The game usually uses a square grid (3x3, 4x4, and so on). But, if you wish, your app may use rectangular grids.
- Another input for the goal number which must be a power of 2 (such as 64, 128, ..., 1024, 2048). To avoid data input mistake, use either a radio button or a dropdown selection for this field.
A button "Back to Game" to take the user back to the main screen.
Upon entry to the "Game Configuration" screen, the current board size and target value shall be displayed on these input fields
Game Reconfiguration
Upon arrival at the main screen from the "Game Configuration" screen,
- Your app shall reset the entire board and other game states when a different board size was selected.
- Your app shall resume the current game when the user changed only the goal number.
shall be displayed to the user.
Navigation Between @Composable
As explained in lecture, in Android a "screen" can be either an Activity/Fragment or a @Composable in an Activity. In your JetPack compose-based application, the "Main Screen" and "Game Config Screen" are two @Composable functions.
Using the analogy of "Traveling Between Two Cities" used in lecture, navigating from one screen to another is similar to driving out of town from home. After you are done doing your task out of town you will return home.
- Your trip from home to out of town is like invoking a function which also allows you to "bring stuff" (via function arguments) into the destination "city" (screen)
- Your trip back home is like a
returnfrom the function, which also allows you to "bring back stuff" to use at home.
Using Navigation Stack
The common mechanism for passing function arguments INTO a function and the return value FROM a function is to use a stack. Likewise, navigating between screens also benefits from using a Navigation Stack.
Relevant example app on your instructor's GitHub CS357 Code Example is Android Compose Navigation. Specifically, study the file NavigationDemoWithRoute.kt. In this file you will find two @Composable MainScreen and CityDetails.
- The
MainScreennavigates intoCityDetailswhile bringing in a "city name" (Grand Rapids) and its population (387612). - Upon returning "home", the
CityDetailsscreen uses the Navigation stack to "return" a rounded down population count (387612 becomes 387600)
Using a Shared ViewModel
In the previous assignment you learned how to use ONE ViewModel with ONE @Composable. In addition to navigating and exchanging data between @Composable using the Navigation Stack, it is also possible to have one instance of ViewModel shared by several @Composable functions. The general idea is to have these @Composable hosted by a common parent @Composable who will then create the ViewModel instance and pass it as one of the arguments of each (child) @Composable.
@Composable
fun Parent(/* args */) {

    val theAppViewModel = MyViewModel()   // Parent creates one instance

    // When navigating to Child1, supply the view model instance
    Child1(........, vmdl = theAppViewModel)


    // When navigating to Child2, supply the view model instance
    Child2(........, vmdl = theAppViewModel)

}


@Composable
fun Child1 (/* other args */, vmdl: MyModelView) {
   // Use vmdl to render the UI
}

@Composable
fun Child2 (/* other args */, vmdl: MyModelView) {
   // Use vmdl to render the UI

}Important
Your implementation of navigation between the MainScreen and the Game Configuration screen must demonstrate both of these techniques.
Grading Rubrics (Tentative)
| Grading Item | Point |
|---|---|
| Overall "Game Configuration" Screen | 3 |
| Show current board size input | 2 |
| Show current target goal number (dropdown or radio button) | 3 |
| Handling of board size input changes | 3 |
| Handling of goal number input changes | 3 |
| Game board reset/reconfiguration | 5 |
| Game state reset | 3 |